

In this modern world, it’s important to take screenshots. It serves as a tool for education, communication, and problem-solving. We can quickly capture and share information with screenshots. The idea of a simple tool that could quickly capture an exact copy of your display’s content was unfathomable prior to the development of screenshot functionality. This article gives a guide on two ways that you can use to take a screenshot on Dell laptops and desktop computers. However, if you aim to swiftly identify the optimal technique for capturing screen images and effortlessly incorporate helpful annotations such as lines, rectangles, notes, and emphasis, then
What Is Screenshot?
A screenshot, also known as a screen capture or screen grab, captures the current display on your computer screen. In today’s digital world, taking screenshots appears to have numerous applications. The rising use of screenshots continues to demonstrate that an image can better capture attention and convey information than a long piece of text. Consider that you want your coworkers’ feedback on a new website you’ve built, or maybe you want their thoughts on the digital flyer you made.
Your coworkers might review the content and make notes about potential changes or improvements. Alternatively, they could simply capture a screenshot, identify the necessary changes, and forward it to you. Selecting the second option would be more straightforward and efficient. When you’re having trouble, screenshots can be very helpful. When you call the IT or Web Support team to report a problem, they will often ask for a screenshot. Giving one can make it much easier for the support staff to understand the problem and figure out how to fix it.
However, there’s more to it than that. Let’s say you are writing a guidebook for your group. Simply capture a few screen images and walk through the steps. It’s not necessary to write long texts when you can quickly point people in the right direction with notes and marks on the images. In light of this, a screenshot can be incredibly helpful for both personal and professional reasons. If you’re using a Dell laptop or desktop and aren’t sure how to take a screenshot, keep reading for directions.
How To Take A Screenshot On Dell Laptop And Desktop?
There are many simple ways to capture a screenshot on Dell laptops. This method is compatible with all laptop models and series. Take a screenshot on Dell laptops and desktops using the guide below.
The Print Screen (Prt Sc) Combinations
Different Dell laptop models may have a different name for the Print Screen key, usually marked as “PrtSc.” Your keyboard places this key on the top row and connects it to F10. The button is next to the “Delete” key on some Dell computers. You have the ability to take screenshots in a variety of sizes if you press the Print Screen key and certain keyword combinations. Windows 8, Windows 8.1, and Windows 10 can all use this method. Follow these steps to finish.
- There is a way to capture the whole screen. At the same time, press the Windows and Print Screen keys. Once you successfully capture a screenshot, your screen will briefly flash.
- Simply click on the window you want to capture, then press the Alt and Print Screen (Prt Sc) keys simultaneously to take a screenshot of it.
- Last but not least, press the Print Screen key to capture an image of each open window on your screen.
What Is The Location Of The Screenshot Folder?
After taking a screenshot on your Dell laptop, you copy the image to your clipboard. After that, you can add it to a program for changing photos, like Microsoft Paint, and save it.
How To Take A Screenshot On Dell Using A Snipping Tool?
If you prefer another option, the Snipping Tool is available. You can take screenshots in a variety of forms using this built-in function within Windows.
- To launch the Snipping Tool, press the Start Menu button and type “Snipping Tool” in the search bar. When you do, the app and other options appear.
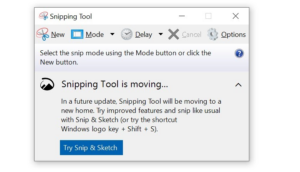
- You can click “New” or press “Ctrl + N” on the keyboard. Pick the size you want for your screenshot. The screenshot will be a rectangle by default, but you can also choose from three other forms.
The Free Form Snip – This function allows you to take screenshots in various forms.
The Window Snip – With just one click, the Window Snip feature makes it easy to take screenshots of your open windows.
The Full-Screen Snip – When you use the full-screen snip tool, it takes a picture of your entire screen at once. This function is very helpful for people who use more than one screen.
After capturing your screenshot, press “Ctrl + S” to save it to the desired location.
How To Take A Screenshot On Dell Using Markup Hero?
This software is both simple to use and powerful. The app lets you take, edit, and name screenshots while on the go. It lets you write down your ideas and thoughts, highlight them, and share them with your coworkers and peers. In addition, it gives you the ability to sort your snapshots into groups, arrange them nicely in predetermined folders, and label them for quick access.
Because they encourage productive communication and manage project planning across different time zones and locations, these function capabilities are incredibly helpful for joint groups, especially those involved in outsourced software development work. Additionally, you can share your images online, which can greatly speed up your work processes and allow clear communication. Here’s how to use Markup Hero to take a screenshot on Dell laptops and desktops.
Download Markup Hero
To begin, you need to get the Markup Hero app. It’s free to use, and you don’t even have to sign up for it. Windows, ChromeOS, MacOS, and Linux are just a few of the popular systems that Markup Hero works perfectly on.
Install Markup Hero
After successfully downloading Markup Hero, navigate to the “Downloads” folder on your laptop or computer and double-click the.exe file to initiate the process. That’s all there is to it. There is no need for any extra setup. To open the app, press Ctrl + Shift + 1 at the same time.
How Markup Hero Works
With Markup Hero, you can capture a portion or all of your screen in a screenshot. Once you take the screenshot, the tool uploads the image to the internet. You can highlight, annotate, and modify your image as needed with Markup Hero. By letting you neatly arrange your screenshots for later recovery, Markup Hero will cut down on the time you spend managing them. The ability to modify and update your notes is another feature. When you use tags, you can quickly find the exact thing you need. The following are some things you can do with Markup Hero.
- You can upload files from Google Drive, including documents, sheets, slides, and images.
- Include a variety of forms of annotations and markups, such as arrows, text blocks, highlighted areas, a range of colors, circular shapes, and rectangular outlines.
- Arrange your screen shots so that they are simple for your friends to get.
- Adjust your screenshot privacy settings so that only you or your friends see them.
- Create several pages and combine screen shots to create a movie.
FAQs:
How To Take A Screenshot On A Dell Tablet?
We simultaneously press the Windows button and the Volume Down button.
How To Use The Blue Signs On My Dell Laptop Keypad?
To use them, press and hold FN. This should make the “function” keys work. For this to work, the FN button needs to be blue.
Consider The Following:
- Google Chrome Extensions
- Lock Screen Apps For Android
- RAM Cleaner Apps For Android
- Call Recording Apps For Android 14
- Calculator Apps For Android
Final Thoughts:
Your Dell laptops and PCs come with a variety of screenshot options. However, if you’re looking for a wide range of tools that not only let you take screenshots but also offer additional features, you might want to think about using different tools.